

The resistor is a component that controls the flow of current in the circuit. There are some signs that help you find a bad resistor.
Some bad resistor symptoms are the body is busted open, and there are cracks on the body. The resistor is acting short or open upon testing with a multimeter, or its value is not matching its given value with the provided tolerance.
There are a lot of options through which we can check a resistor or a bad resistor – including checking by a multimeter, ohm meter, component tester, and much more.
Bad resistor symptoms
A resistor is a two terminals component. It is passive in nature and is used in almost every circuit for its variety of functions.
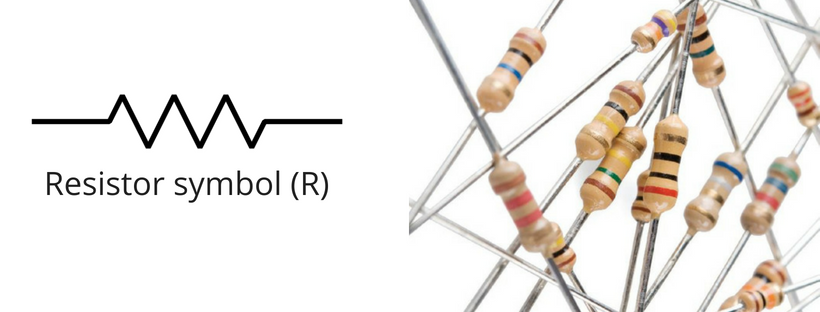
It is most commonly used as a current limiter which means it limits the current flow to a specific required value.
The interesting part about the resistor is – it is not used at the front end of devices which means that its chances of burning out in a circuit are not that high.
Though it is possible that it may burn, the point is a resistor would be the last component to be suspected when troubleshooting or repairing an old circuit board.
Yes, if you are working with a power electronics circuit where there is high power flowing all over the circuit – then the resistor should be treated as fully as the rest of the power electronics components.
With that said let’s see some bad resistor symptoms.
- Its body may be busted due to current overflow (true for both in circuit and off circuit resistors)
- There are cracks in the body.
- The color has changed
- Acts open or short
- The value has changed due to excessive heat
- Broken
The above are some common symptoms that help us check a bad resistor. Now, to carefully examine these given symptoms we need to see them in great detail.
Following are the methods that we can use to tell if we have a bad or good resistor in the circuit or off the circuit.
Method 1: Visual inspection
In this method we visually see a resistor and try to look for the following point as we discussed above:
- Cracks on body
- Busted open body
- Broken body
- Color is change
See the following examples:
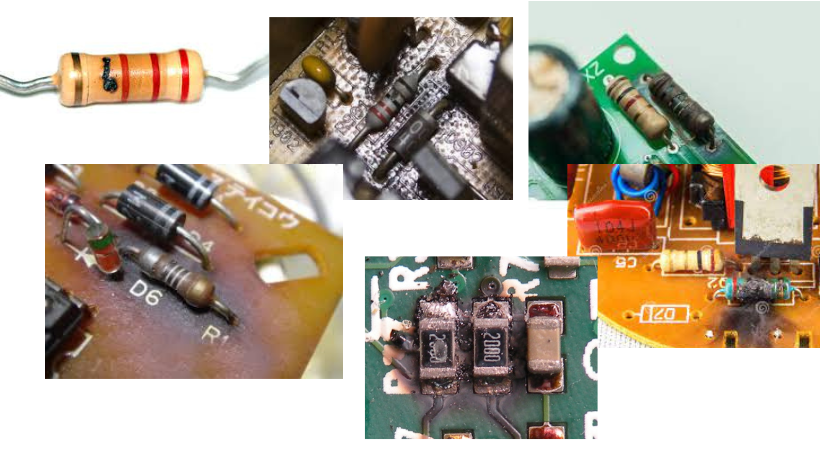
Now, a resistor may be through hole or SMDs. These given symptoms apply to both.
You see, this method quickly identifies a bad resistor in no time. But its limitations are visible symptoms. Like you can not judge or find out a good looking bad resistor through this method.
Surely, this method is time saving. Resistors that we find through this method should be immediately replaced if they are in the circuit. If they are solo then they should never be used in any circuit and should be thrown away immediately.
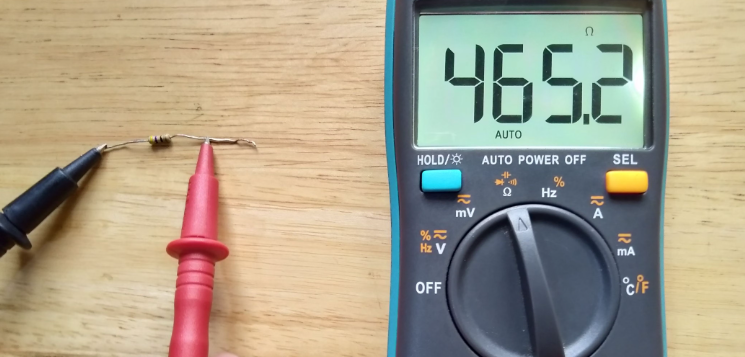
Method 2: Open or short resistors
By open, I mean a resistor that shows infinite “OL” reading on a multimeter. And by short, I mean a resistor that shows zero (0) reading on a multimeter.
To check for these bad resistor symptoms we need to have a digital auto range multimeter.
Follow the following steps for this method:
- Take your r multimeter and the resistor you want to test.
- Set the multimeter to resistance function
- Connect the probes of the multimeter to the resistor – don’t worry about the polarity as resistors are nonpolar components.
- See the reading on the screen
If the reading says OL then it means you have an open resistor. If the reading says 0 then you have a short resistor.
Both these types of resistors are bad, don’t use them.
This method is also applicable to in circuit resistors. But the circuit must be turned off before testing any resistors.
In case you don’t turn the circuit off, chances are you will get an equivalent resistance of all the components attached to the resistor (in series or parallel) you want to test.
Now, you can carry out this method by using an Ohm meter as well. All the steps are the same.
Method 3: Matching the values
So in the above method, we look at open or short resistors. What if that is not the case and still you have a bad resistor.
You know, short or open are the extreme cases for the bad resistors. These situations happen when there is an excessive flow of current through the resistor.
Now, matching the value in the intermediate case. In this case, we see the resistor value by a multimeter and try to compare it to its actual value. If the measured multimeter value matches the given actual value of the resistor we say the resistor is good, else you have a bad resistor.
Alright!
Follow the following steps for this method:
- Take your multimeter and set it to the resistance function.
- Take your resistor and note its actual value from its given color code (printed on its body)
- Also include the tolerance value when you are calculating the actual value from the color code.
- Connect the resistor to the multimeter using the probes
- Note the reading on the screen
If the value on the multimeter matches the value you calculated, you have a good resistor. It is not necessary they should exactly match. The multimeter reading must be in the tolerance added range of the resistor calculated values.
For example, a resistor has a value of 100 Ohm with a tolerance of 5%. Then the range is 95 to 105 Ohm. The multimeter reading must be in this range.
If the values don’t match or exceed the calculated range by a very high degree then unfortunately you have a bad resistor.
If the values don’t fall in the good range, but they are close enough, that resistor can be considered good.
Now, this method can be used for in-circuit testing as well. But the circuit must be powered off and de-energized first. By de-energizing I mean if there are capacitors inside that circuit, it must be totally discharged first.
Method 4: Using a component tester
Alright, so until now we looked at various different methods to help us tell if the resistor is bad or good.
Now, let’s talk about a very simple method that I find very interesting. It is called testing a resistor by a component tester.
A component tester as the name suggests is an electronic device that we use to test a component if it is good or bad.
The component tester I like is the M328 Component tester, but you can work with any available component tester.
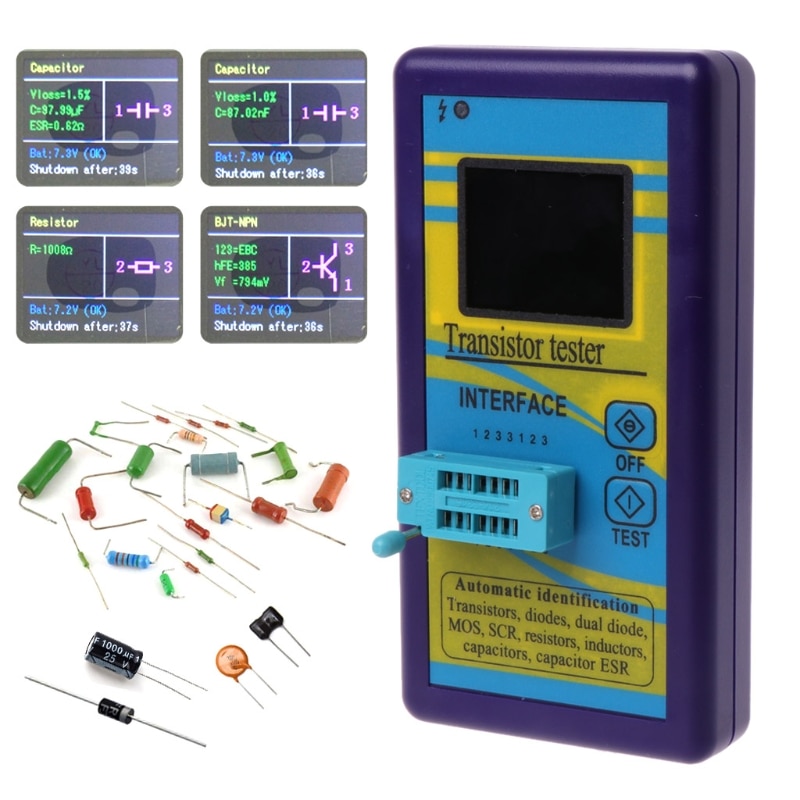
Follow the following steps for this method
- Turn on your component tester
- Put your under-test resistor in the socket of your tester
- Press the test button.
- See the results on the screen. If it is a good resistor it will give you all its related values, i.e., Ohm value.
- If it is a bad resistor, the tester will give you a message that it is a bad component – it is that simple.
The limitation of this method, using a m328 component tester (Amazon link) is you cannot apply it to in-circuit resistor testing. But a component tester will make your life very easy if you work with a bunch of different components.
Conclusion
You know, a resistor is a very fundamental component that we use in almost every circuit. It has two terminals, and it acts as a passive element in both electrical and electronics circuits.
If this guy fails to operate we have serious issues in our circuits. In worst cases, such a situation can permanently damage our circuits.
Resistor fails to operate mostly because of over current and voltages. But in my opinion, as resistors are always at the front end, the chances of failing resistors are very low.
Alright!
To test a resistor in a circuit or off circuit we have to look at some bad resistor symptoms.
In this article, we just try to do that, i.e., we look at some bad resistor symptoms and try to present some methods that can help us identify a bad resistor.
Bad symptoms include, the body of the resistor may be busted open, there being visible cracks, the resistor being broken, and much more.
To tackle these symptoms and to verify if a resistor is terrible we then look at some resistor testing methods. All the methods discussed are simple and easy to follow.
So that is it.
That is all I have to share with you guys. I hope you enjoy it this far.
Thank you and have a grateful life.
**We learned about the bad symptoms of a resistor. Keep learning about resistors by exploring how to measure resistance value using a multimeter.
I love the informations I gathered here, it helps me a lot.
And I wish to know more.
How can I join your class in order to learn more?
Thank you. Yes I have written a detail book for beginners in electronics 🙂