

Resistor testing (Know if resistor is bad, open, short 2026)
Resistor testing is essential. Because it helps us to know if the resistor is bad, open, or short. So that we can replace it with a good one on time.
For resistor testing first, you have to visually analyze it, and look for any physical damage or burnout. If you see any damage change the resistor. The visual inspection is not enough in some cases devices like a multimeter and component tester are also used to test the resistor if the resistor is working fine or not.
In this article, we’ll learn about resistor testing to know if the resistor is bad, open, or short.
Resistor testing general theory
A resistor is the most fundamental component used in almost every electronic circuit.
Why?
Because it has the current limiting capability, safety feature, voltage division, and voltage reference. Since it is used in a lot of circuits. The chances of getting these resistors damaged are higher.
So we need the correct knowledge of how to test resistors when we are in such situations.
The below section will cover the methods to test various resistors. In this section, I want to share the theory that will make you understand the whole process.
Stating with resistance.
Resistance
Resistance (R) is the capability of a resistor to oppose the current flow through it.
So, a resistor is a component that offers resistance. This concept of resistance is very important in testing the resistor.
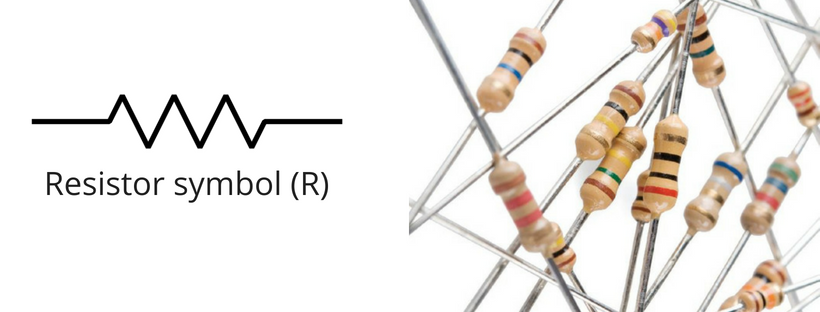
Following is the symbol of a resistor and some actual physical resistors.
We measure the resistance of a resistor by using Ohm’s Law. Since Ohm introduces this concept that is the reason the resistance unit has been Ohm.
Following is the formula of resistance derived from Ohm’s law.
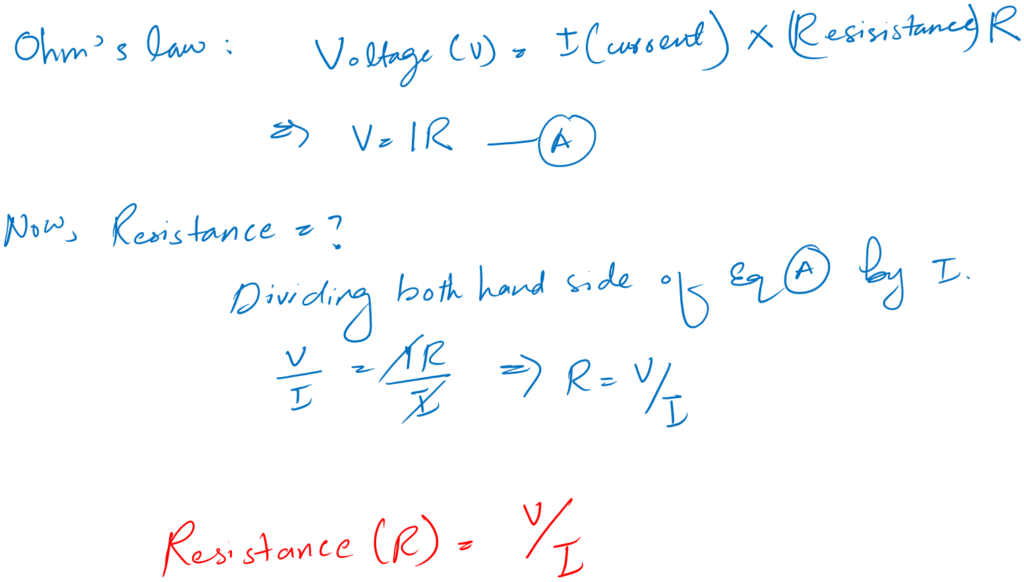
So what does this mean?
It means to measure the resistance of a resistor we need to have voltage and current. If we measure the voltage across the resistor and measure the current flowing through it.
Then the ratio of these two (voltage and current) will give us the resistance value of that resistor.
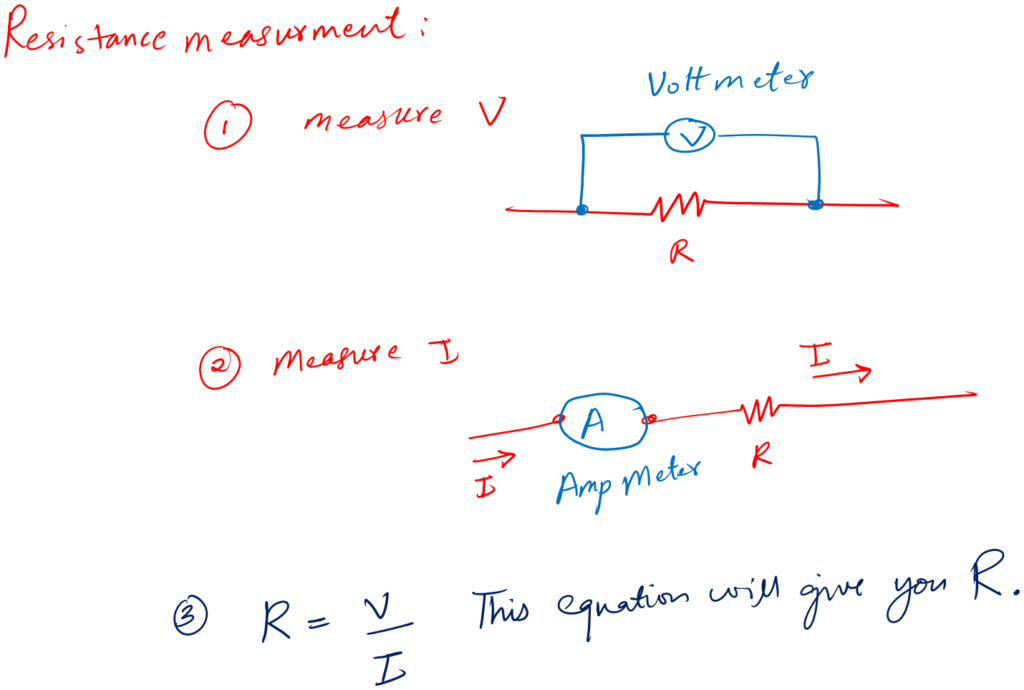
We use this process in a multimeter to measure and check the resistor.
Now, you know that we measure resistance to test a resistor.
The next question is what criteria we should follow to tell if a resistor is bad or good.
1. Good resistor
A good resistor is one when we measure its resistance value. This measured value (by using any tool or device) equals its manufacturer-provided value.
To find the manufacturer-provided value, we can use the datasheet or read the resistor color code on its body.
On the opposite side, a bad resistor is one whose measured resistance value does not match its actual manufacturer-provided value.
2. Open resistor
Open resistors are those which give the resistance value of infinite.
For example, when you measure an open resistor. The device or the multimeter will give you “OL” readings on the screen.
An open resistor is always a bad resistor. Don’t use it in your projects.
Let’s see the mathematics behind it.
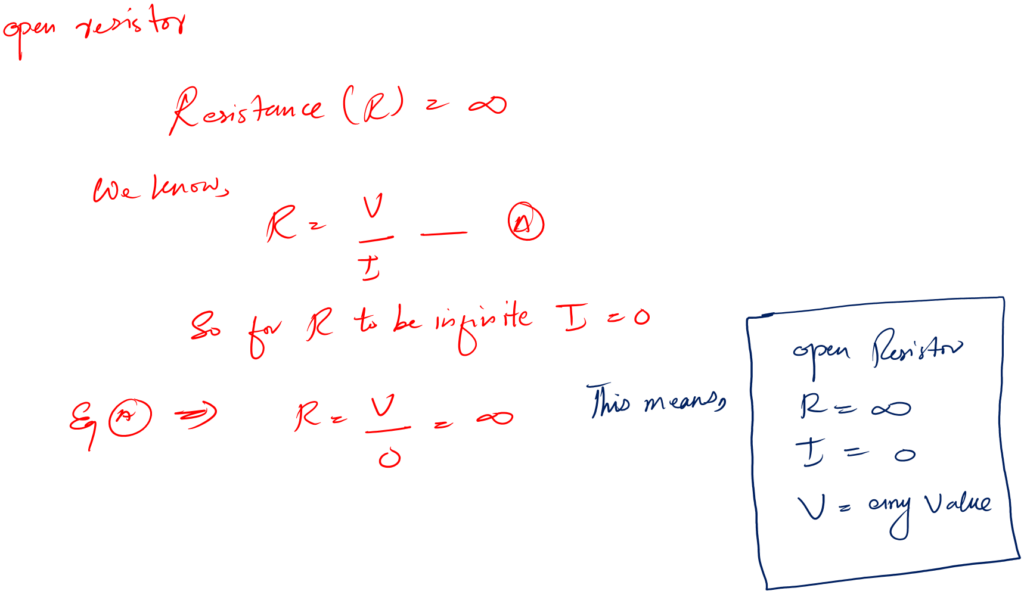
So for an open resistor, there can be any voltage value possible across it. But there is no current flow through it.
This means if we have an open resistor in our circuit. The entire circuit may not work because of the lack of current supply.
This happens in a circuit due to overflow of current or over voltage.
3. Short resistor
A short resistor is also a bad resistor. We don’t use it in our projects.
To define a short resistor, it would be like this. A short resistor has zero resistance.
For example, when we measure a short resistor the multimeter will always give the reading of 0 on the screen.
Let’s see the mathematics behind it.
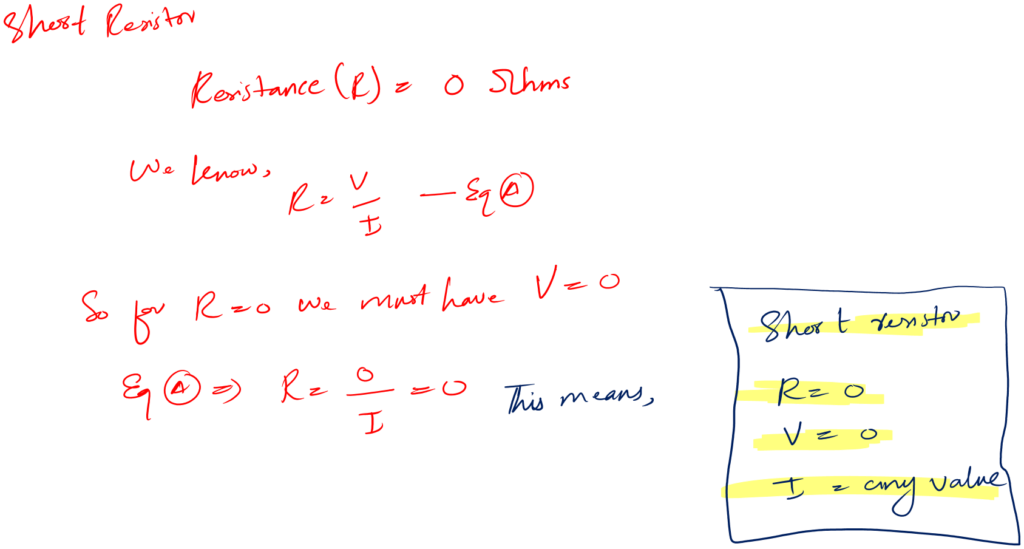
So in the case of a short resistor, there will be zero voltage across it and any value of current can flow through it.
This means if we have a short resistor in our circuit a huge amount of current can flow through the entire circuit and can damage the whole circuit.
In summary, to test a resistor we need to measure its resistance value.
- If this resistance value we measure is equal to its actual value, then it is a good resistor.
- If not then it is a bad resistor.
- There are two types of bad resistors. One open resistor has infinite resistance.
- The second one is a short resistor that has zero resistance.
- Both open and short resistors are bad resistors, and we should never use them in circuits.
Resistor testing methods
If you understand the above theory then you can think of a lot of ways to test a resistor. I encourage you to put your creativity to the test and think of new ways.
You can share that in the comment section below. And I will be there to tell if it is practical or not.
Anyway.
There are three proven methods using which we can easily tell if a resistor is a bad or good one.
They are:
- Visual method
- Multimeter method
- Automatic method
Let’s talk in detail about these in the following sections.
1. Visual method
This method is all about looking at the resistor with the naked eye. And simply figure out the bad ones from the good ones.
You know, resistors deal with current. A lot of time due to overcurrent flow these resistors are busted open. And you can easily identify them just by looking at them.
Following are the examples of such cases:
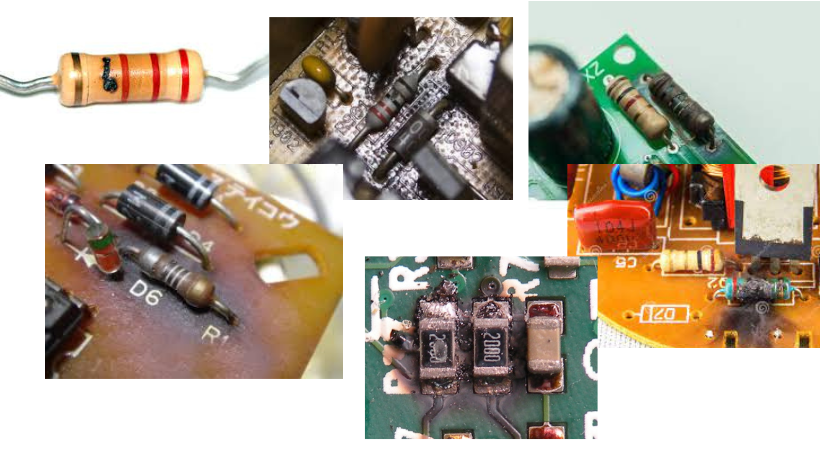
You can see the bad resistors. These resistors don’t need any testing or measurements.
All we need to do is to replace them with good ones immediately.
2. Using a multimeter
You know, visual inspection is enough in the majority of cases. But let’s try to learn how we can test a resistor with the help of a multimeter.
For this method of course you require a digital multimeter. I would recommend having an auto-range one like the AstroAI multimeter (Amazon link).
Alright!
Let’s explore this method for various resistor types.
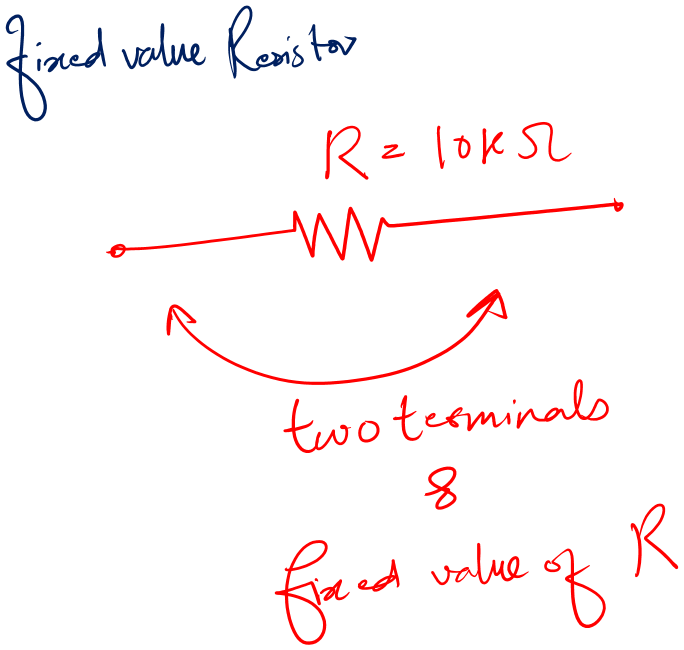
a. Fixed value resistors
By fixed value resistor I mean those resistors which are two terminals and have a fixed resistance value.
Take your multimeter and the resistor you want to test. And follow the following easy steps.
- First, get the resistor value by reading its color code (the color strips on the body of the resistor). You can use this online calculator as well.
- Now, set the multimeter to resistance mode.
- Connect the probes to the terminals of the resistor and note down the value.
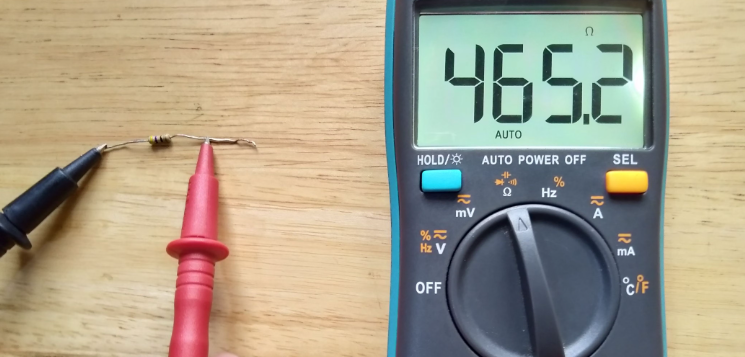
- Compare the value you measured with the multimeter with the color code value.
- If they match, you have a good resistor else your resistor is bad.
Open resistor: If the resistor is open. You will have an “OL” reading on the multimeter screen.
Short resistor: If the resistor is short. You will have a “0” resistance value on the screen of your multimeter.
b. Variable resistors
This type of resistor can have different resistance values and for this reason, it is called a variable resistor.
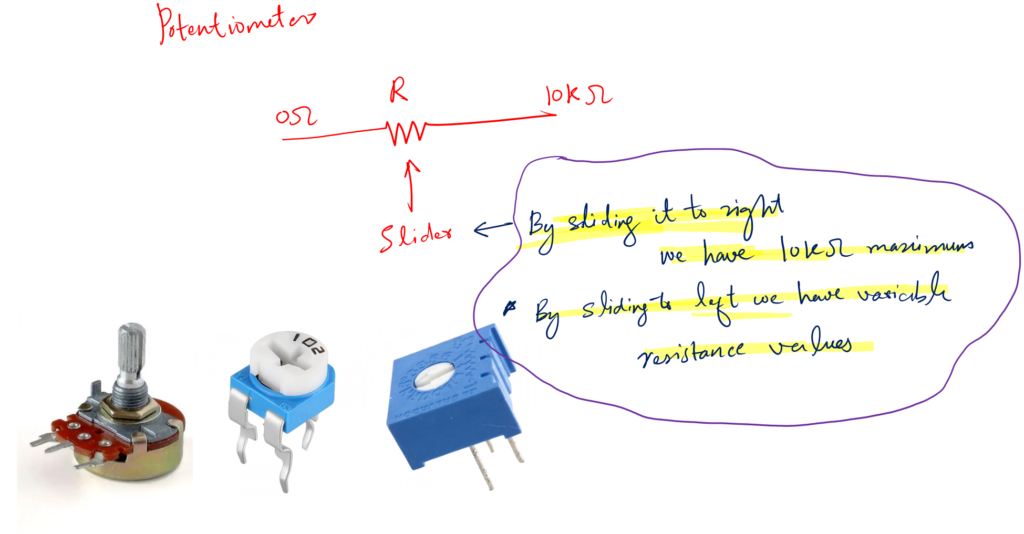
It is also known as a potentiometer. Because by varying the resistance value we can change potential or voltage values in a circuit.
Remember, a potentiometer has two fixed terminals, i.e., the resistance value between these two terminals does not change.
The remaining third terminal is the slider. Changing its position changes the resistance value.
Testing this type of resistor is very exciting.
First, take your multimeter and the potentiometer you want to test. Follow the following simple steps.
- Set the multimeter to resistance mode.
- We have two multimeter probes and three terminals of the potentiometer. Connect the probes to any of the two.
- Change the slider
- If the value on the screen changes – this is your slider terminal. If not then the terminals are the fixed ones.
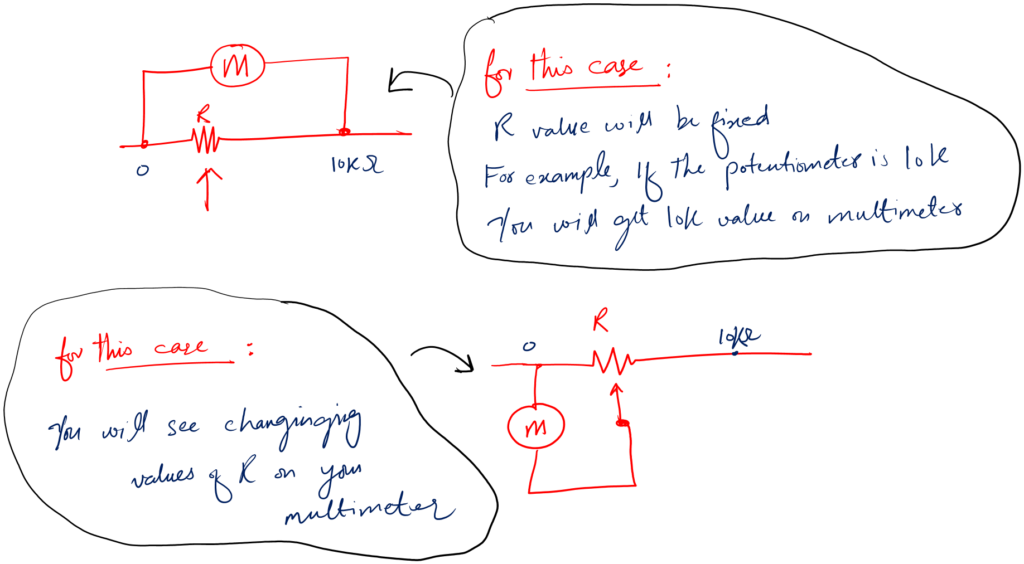
Case 1: Probes are connected to fixed terminals. You change the slider nothing happens.
But you see OL reading on screen. This means your potentiometer meter is open across the fixed terminals.
Case 2: Probes are connected to fixed terminals. You change the slider nothing changes.
And you have 0 reading on the screen. This means your potentiometer is short.
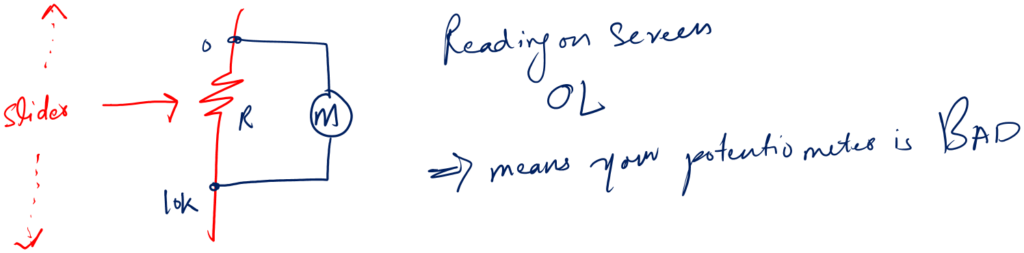
Case 3: Probes are connected to the slider terminal. You change the slider nothing happens. But you see OL reading on the screen.
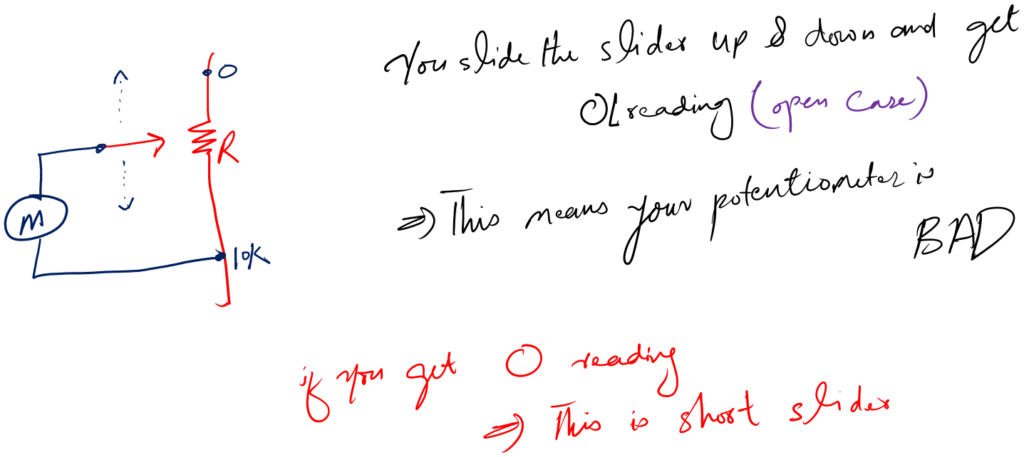
This means your slider terminal is open.
Case 4: Probes are connected to the slider terminal. You change the slider nothing happens. But you see 0 reading on the screen.
This means your slider terminal is short.
As a side note for hobbyists. If the slider is short and the fixed terminals are fine then use it as a fixed value resistor.
c. SMD resistor testing
SMD is short for surface mount devices. Meaning that we solder them on the surface of the board.
SMD resistors are not different in function and testing from the above through hole fixed or variable resistors.
The only difference is they are small and have low power ratings.
To test the SMD resistors follow the same exact methods mentioned above.
For efficient testing, you would require a special type of tweezers (totally optional) for SMDs like the below one.
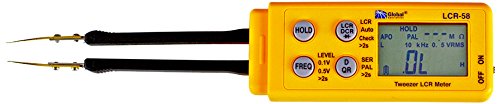
Using this type of tweezer will make the testing process much easier and faster.
3. Using a component tester
I believe you will like this method more than the above one. Why? Because it is very simple.
A component tester is a device like a multimeter. But it is geared toward testing and measurement.
While a multimeter just does the measurement and leaves the testing to the person’s knowledge and experience.
A component tester solves this problem. And tell you directly if the component is bad or good. Leaving the guesswork.
Following is the m328 component tester.
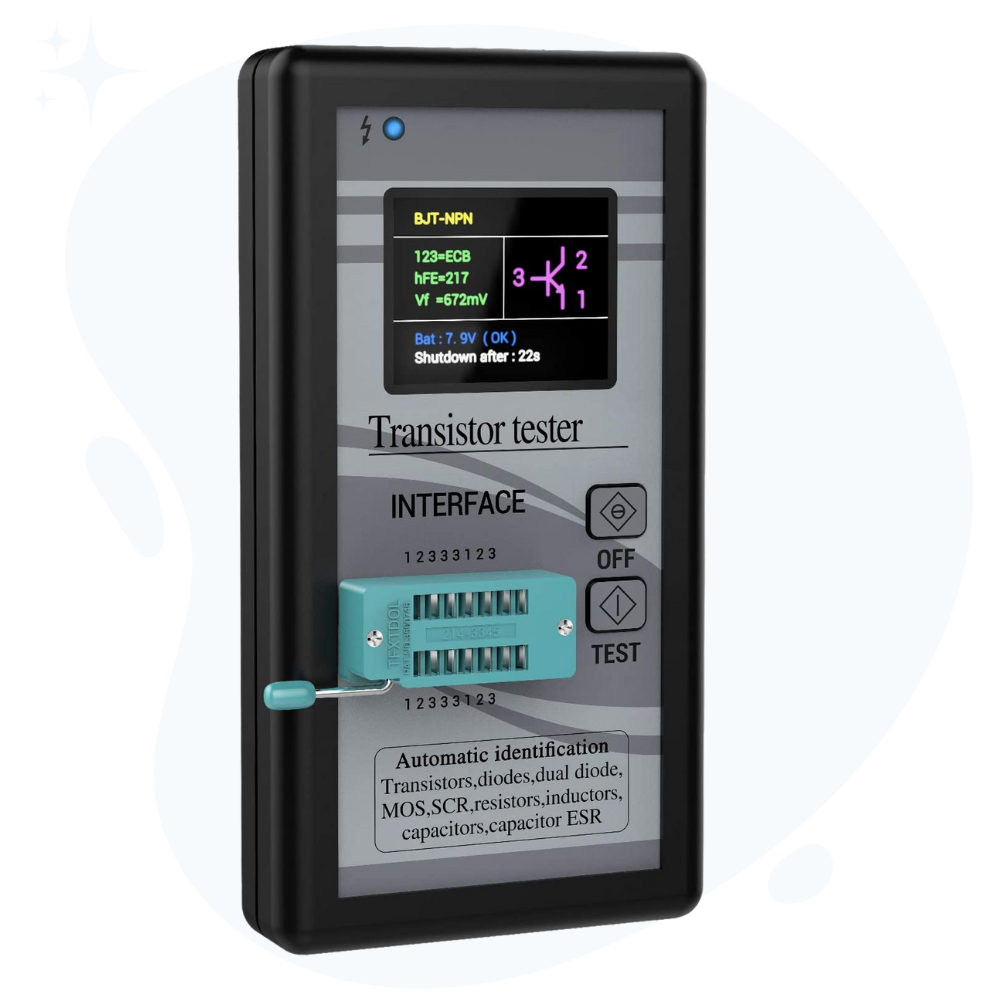
To use this mentioned tester for resistor testing, follow the following steps.
- Take your resistor and the m328 tester
- Turn on the tester and put the resistor in the socket
- Press test button
- See the resistance value if the resistor is fine
- Else the tester will show a message on the screen saying that the resistor is bad
It is that simple. No need for a color code or for datasheet. Simply put the resistor and know if it is good or bad.
Own DIY approach
I suppose you are a complete electronics beginner. And you are interested in doing some small DIYs…
So, I thought why not give you a direction on how you can design a simple circuit to test the resistor if it is open or not?
Sounds interesting?
Alright!
See the following circuit. This is a simple method that can help you identify an open resistor.
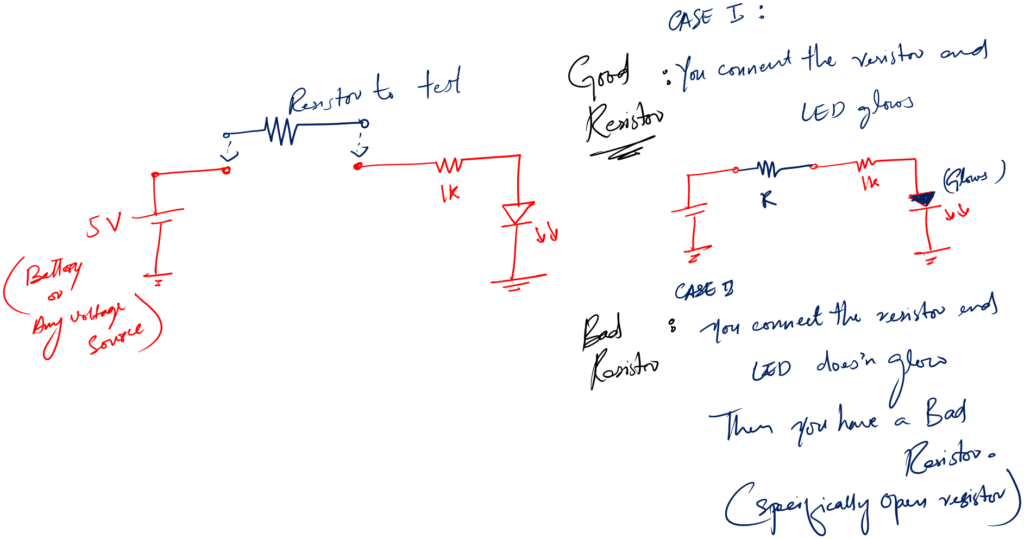
This is just a fun project to test only a 1K ohm resistor. I am sharing it only for learning purposes.
Conclusion
Just like other elctronics component testing, resistor testing means to see if a resistor is good, bad, open, or short.
You can tell this by using a multimeter or components tester. But the most effective, in my opinion, way to test it is by visually seeing the resistor.
A bad resistor is often busted open in the circuit and can be spotted very easily.
Guys, that is it. This is what I believe a complete beginner to electronics should know about testing a resistor.
I hope I was helpful. Let me know which testing method you find interesting and will try the first. Comment below and let me see.
Thank you and have a grateful life.
**We learned how to test a resistor. You can keep learning about resistors by exploring what are the symptoms of a bad resistor.
Thank you, very helpful.
Thank you very much, it was very helpful to me as electronics beginner.
Welcome 🙂
Thank you for teaching. I have one (1) burnt resistor in the ECU of my car (R20F) … there are 7 of these, do I need to replace all the remaining 6 resistors?
If only one burnt resistor, then replace that only one. If, all the resistors are burnt out, then replace all of them.
Thank you for all the information, much appreciating your efforts
Welcome 🙂