

Check resistor value (Resistance measurements 2026)
A resistor is a two terminal component whose value is measured in resistance. You can find these resistors in all electronic devices.
The value of resistance (Ohm) determines the amount of current that should flow through it. So, this resistance value is important to be measured.
We need this value in proper circuit designing, circuit troubleshooting, and analysis.
At the end of this article, you should be able to know:
- How to check resistor value
- What do we mean by resistance value and why it is important
- 3 different ways to measure resistance
- Resistor measurement using a multimeter
- Resistor checking from the given color code
Sounds interesting? Well, then let’s get started.
How to check resistor value
To be able to check the resistor value we first need to know what is a resistor. And why we need to check and measure the resistance value before we put it in our circuits.
Well, the answer to why we check is very straightforward. We don’t want to put a bad value resistor in our circuit. In this way, the circuit will not work.
Every circuit has pre-defined resistor values. We calculate these values according to our project requirements. So measuring and checking these values are very essential in real time.
Alright!
Let’s see what is resistance itself before we try to measure it.
Resistance definition
If we try to understand the concept of a resistor in a simple way. It should be like this. You know everything opposes a new change.
Like we humans oppose new changes in our lives, we oppose adopting new habits and thought patterns. This resistance is like in nature of everything.
The same goes for electronics conductors. The conductor resists when we want to change them by applying a voltage across it.
This voltage creates a current flow that the conductor really doesn’t like and thus opposes it.
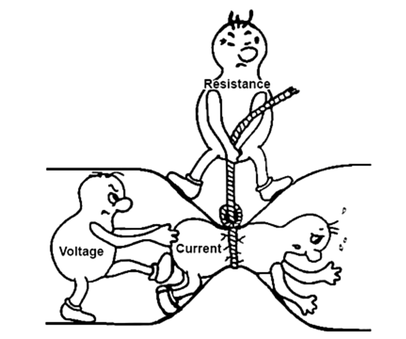
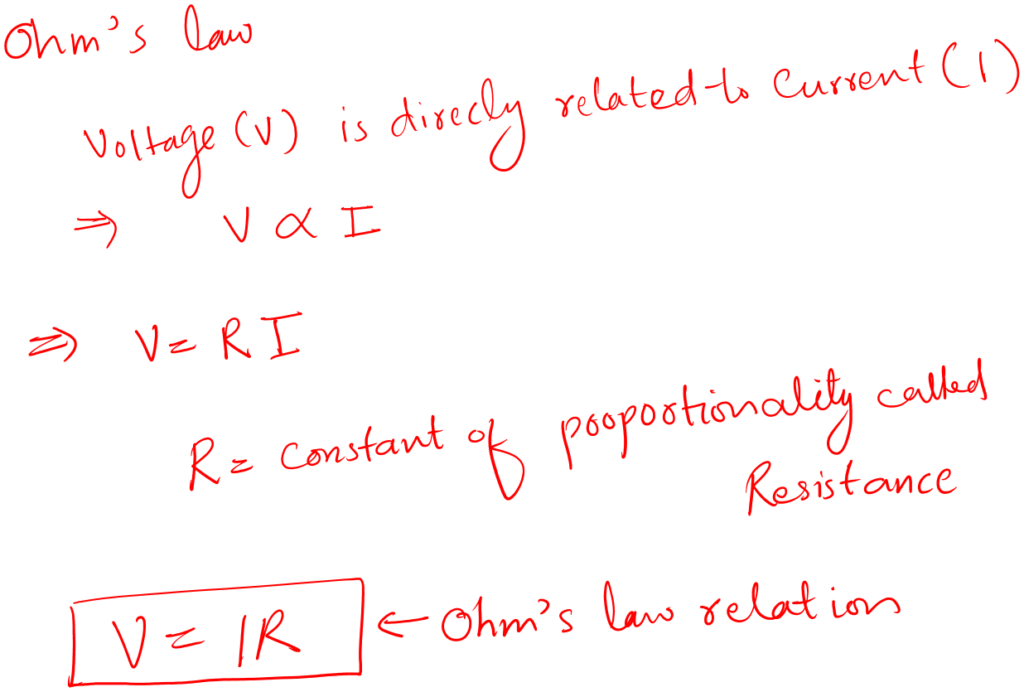
The opposition to the current flow is actually the resistance. Since this phenomenon was discovered by Ohm that is why we measure this resistance in Ohms (in the honor of his contribution).
Now, this resistance is really important, and we can use them for many useful situations. For example, if there were no resistance then an infinite amount of current would flow, and it will burn and damage everything, and no electronics would be possible.
We understood the importance of the resistance and created a separate component in our labs called the resistor which provides resistance to flow of current flow.
Alright!
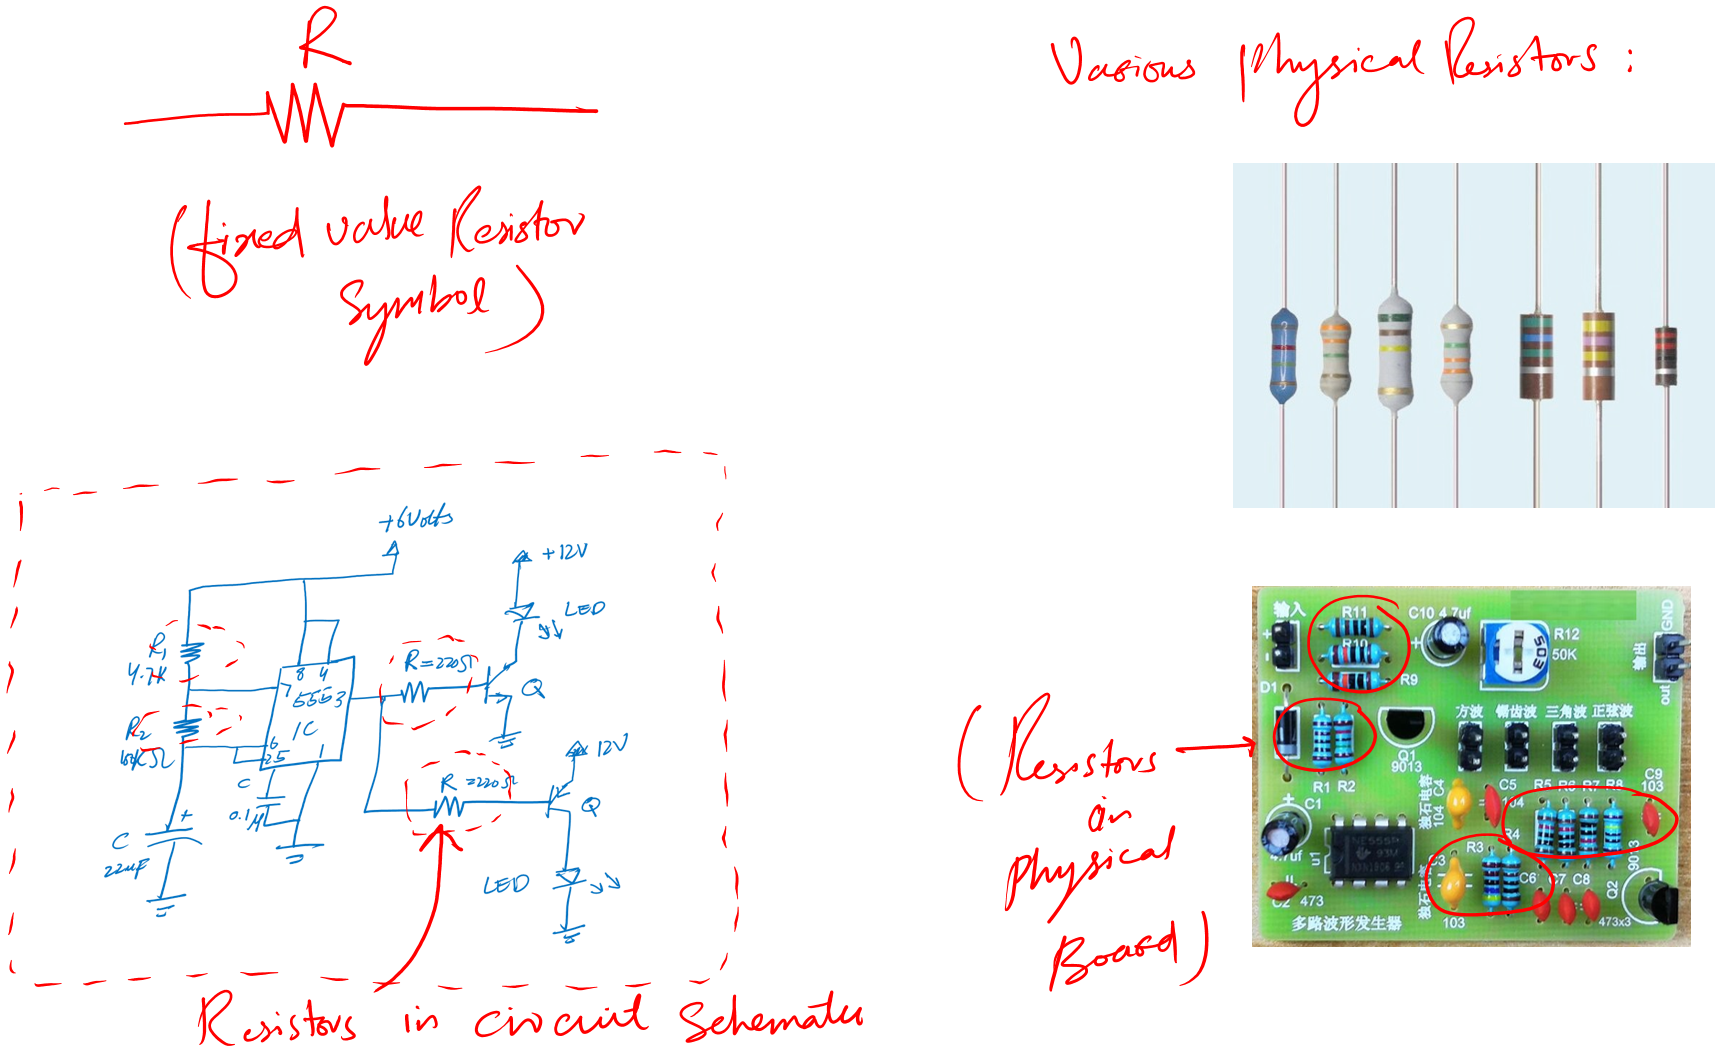
So, basically, a resistor is a two terminal component that opposes the current flow. Following is the circuit symbol of a resistor.
Following is the mathematical expression of a resistor using Ohm’s law:
I guess we know by now what is resistance and why it is significant. It is time to move on to the next sections where I discuss three different ways you can use to measure the resistor.
3 Methods to check the resistance
The following are the simplest way you can use to measure and check any given resistor value.
1. Checking the resistor value from the color code
This method requires us to read the code on the resistor body. If you pay attention to the resistor above you will see that there are color stripes on each resistor. These stripes are actually the color code.
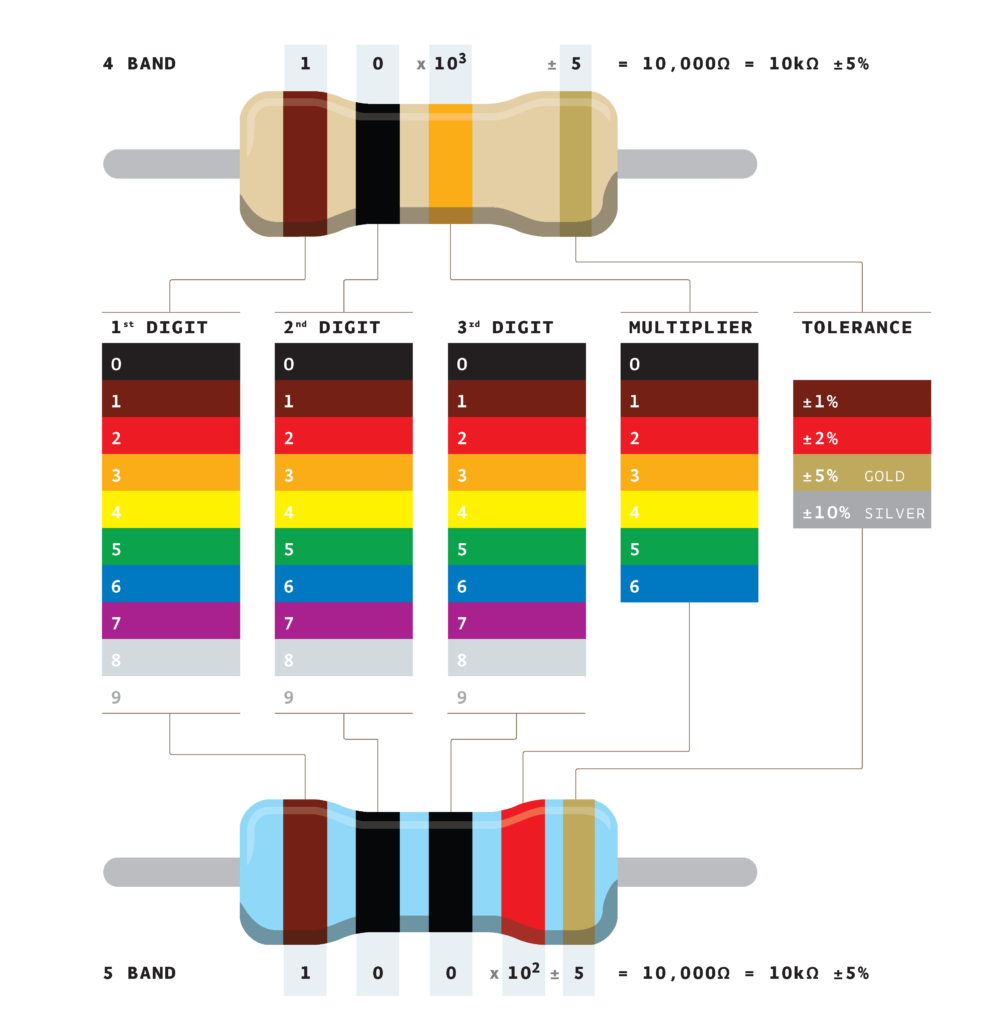
By reading this color code you can actually tell the value of any resistor. It is useful when we test our resistor.
Reading a color is easy and straightforward. The first color in the stripe is your first digit, the second color is the second digit, the third color is 10 power, and the last one is the tolerance value.
In practice, we usually don’t prefer this method as it is very time consuming.
2. Resistance measurement using a multimeter
For this method to check the resistor value we require a multimeter like this one (Amazon link).
For all the multimeters, you will observe the sign of “ohm” (Ω) somewhere on your multimeter. This is where the knob of your multimeter should point when you wish to measure resistance using a multimeter.
The Auto-range multimeters have only one setting or point where you will point the knob of your multimeter to measure resistance.
If you have a such a multimeter, know that you are working with an auto-range multimeter.
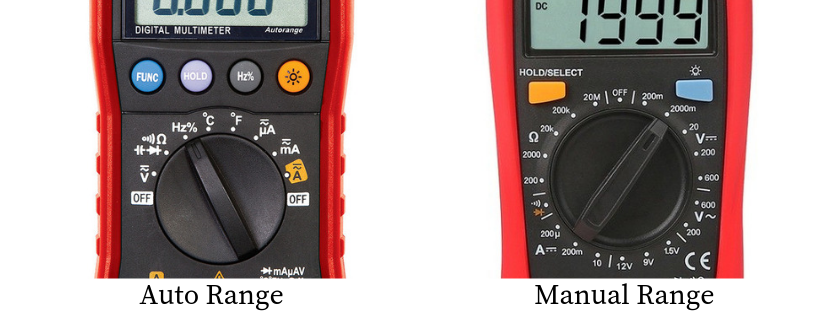
For the manual range multimeters, there is a single ohm sign and then there are multiple ranges defined under it. You can choose from all the given ranges according to your needs.
See the above for your reference. If your multimeter’s settings panel looks like this, you are having a manual range multimeter.
Auto-range v/s Manual range
While we are already on the topic of Auto-range and manual range multimeter settings, why not discuss a little deeper to know which one is better and why?
The auto-Range multimeter will not bother you at all, you just put the probes across the resistor, and it will give you value right away.
It seems pretty easy right??
On the other hand, while dealing with a manual range multimeter, you will have to keep rotating your knob to get to the right setting or range for your resistor.
This can be pretty tricky in the beginning as you yourself will sometimes experience it if you are using one. Sometimes you are expecting a larger resistance value, but your multimeter gives a small value, and you later figure out, you were working in the wrong setting all this time.
So, in short, an auto range multimeter will save you lots of time and energy in your life.
Step by step guide on resistance measurements
Now that we already have had a detailed introduction about resistance measurement settings on a multimeter, let’s dive into our actual goal, measuring resistance using a multimeter.
So, grab your materials, and let’s get started.
1. Connecting the probes
Connect the multimeter probes to the correct terminals. You might wonder at this point what the correct terminals are, right? Let me tell you in more detail. Look at the image below.

Most multimeters have three or four terminals and 2 probes. If you look closely, you will observe that each terminal is labeled.
The most common labels in multimeters are COM, VΩmA, and 10A.
The COM terminal is the common terminal or ground.
The VΩmA, as it indicates, is voltage, ohm, and milli-amps port. This means you can measure voltage, resistance, and small currents using this port.
So, for you, the correct terminals will be the COM and VΩmA terminals. Yes, you guessed it right. Connect the black probe to the COM port and the red probe to the VΩmA port.
2. Tunning your multimeter into OHM meter
Now that you have connected the probes, you need to turn your multimeter into an ohm-meter, i.e a device that measures resistance. To do so turn the knob of your multimeter to Ω sign.
If you have an auto-range multimeter, you don’t have to worry much. But if you own a multi-range multimeter, you need to find a suitable range for the resistor you have chosen.
3. Open/Short circuit tests
These are the tests we conduct to ensure that the multimeter we work on is fine and are providing accurate results.
For the open circuit, after tuning into Ohm meter we left the probes as it is i.e., open (not touching any device or itself as well). We check the display. If for such a situation multimeter is giving a reading of OL or 1 it means our multimeter is in good shape.
For the short test, we short the probes and see the results on display. This test should give a reading of 0 on the display.
4. Measuring the resistance value
After the tests, we are good to go with resistance measurements.
- Connect the probes of the multimeter to the legs of a resistor, one probe would be on one side while the other one is connected to the other side.
- It is important to note here that a resistor has no polarity, so it doesn’t matter which way you connect your probes to the resistor, the value of resistance will be the same.
- See the results on the multimeter screen – it is just that simple.
Another significant point here is for people using a multi-range multimeter.
You must start from the minimum range of resistance for your multimeter. If your resistance value is bigger than this range, you will observe ‘OL’ value written on the screen.
Switch to the next range and observe the value, if the same reading appears, increase the range of resistance again until you observe a numeric value on the screen.
The OL value means “overload”, which means the multimeter is unable to measure the value of the resistor in the selected range.
3. Checking the resistor value using a component tester
A component tester is a basic tool that helps us measure the resistance values of any given resistor. It shows us its circuit symbol. The most important part is that it also tells if the resistor is good or bad.
Following is the M328 component tester:
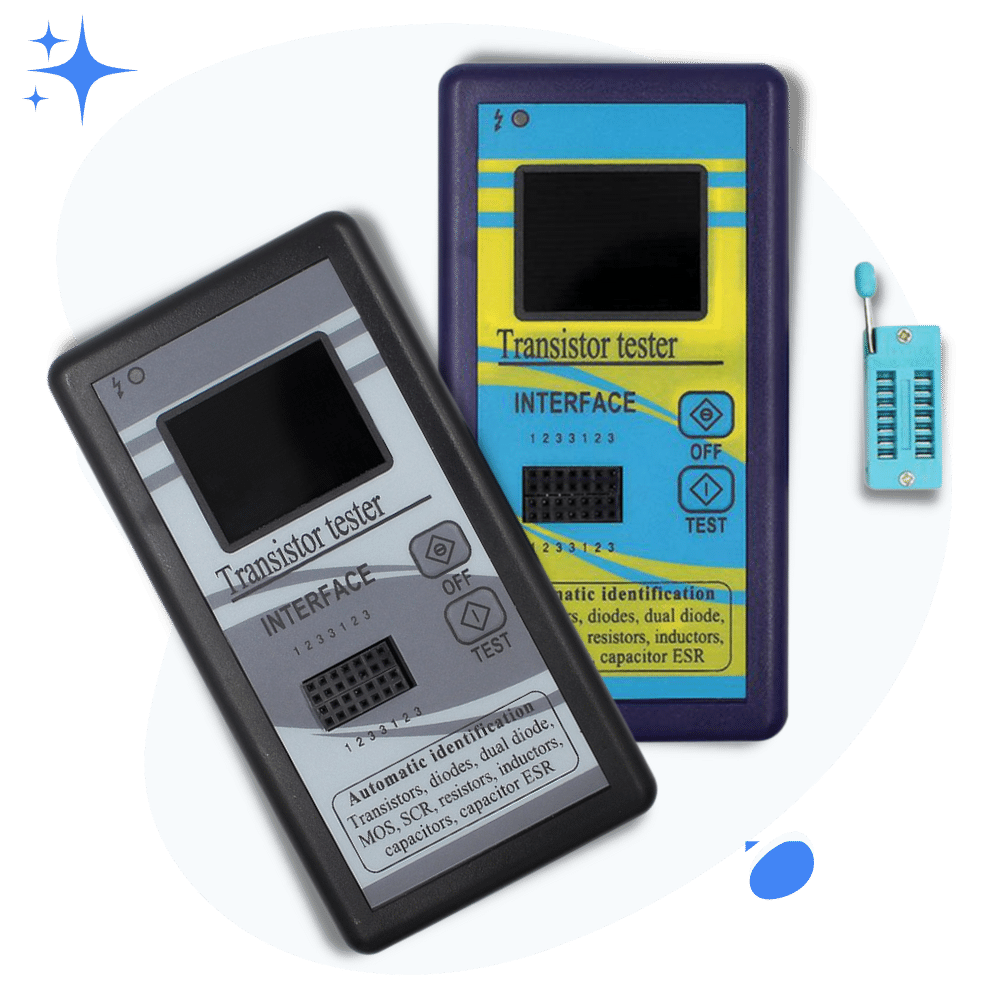
Following are the steps to use this tool for resistor checking:
- Take the component tester and your resistor
- Put the resistor in the tester socket
- Press the test button
- See the resistance value on the screen
- It is just that simple
Now, if the component tester mentioned above has got you curious and wants to know more about it. Here is the link, M328 Component Tester (Amazon link), for your own further research and investigation.
4. Checking resistor by using an OHM meter
This is a bonus method.
We usually don’t use it that much, but it is good to know as a beginner that you got this measuring option as well.
For this method, we need an Ohm meter. An Ohm meter as the name suggests is the meter that measures Ohms (the resistance).
Why we don’t use this method? Because today’s modern multimeter has built in an Ohm meter. So there is no need for buying a separate Ohm meter. Of course, you can buy an Analog Ohm meter for your lab, but it is totally optional.
Conclusion
A resistor is one of the fundamental components in electronics. It is part of almost every circuit you will encounter.
So, as a beginner, it is very important that you learn how to check resistor values. Also, to learn how to test a resistor if it is a good or bad one.
To check a resistor value there are three proper ways:
- By using the color code given on the resistor body
- By measuring the resistor value using a multimeter
- Measuring the resistor value by using a component tester
You can also use an OHM meter. But that method is no longer used these days because of available digital multimeters.
Alright!
That is it. That is all I have for you about checking a resistor value. I hope you enjoyed it.
Thank you and have a grateful life.
Other useful posts: