

Identify terminals of unmarked diodes (Easy Solution 2026)
So, there is an unmarked diode on your lab desk. Or you’re working with an old PCB and you find out a diode whose marking has vanished with time.
Or maybe you just want to know how to identify the terminals of unmarked diodes.
There can be various other reasons as well.
In this article, we will see some methods which can help us to tell the terminals of unmarked through-hole diodes.
I am not perfect, nor this article is going to be. This is just my limited knowledge try to help you somehow.
I hope you will enjoy this article.
Identify the terminals of unmarked diodes
There are two methods (in my knowledge) that can help us achieve this task.
The first method requires a multimeter and the second method requires a component tester. Both methods are easy to implement.
Let’s have a look at them individually.
Method 1: By using a component tester
A component tester is a device that helps us identify a component, tells us if the component is good or bad, and also gives us the related parameter to the components.
Following one is the most used component tester by a lot of students and professionals.
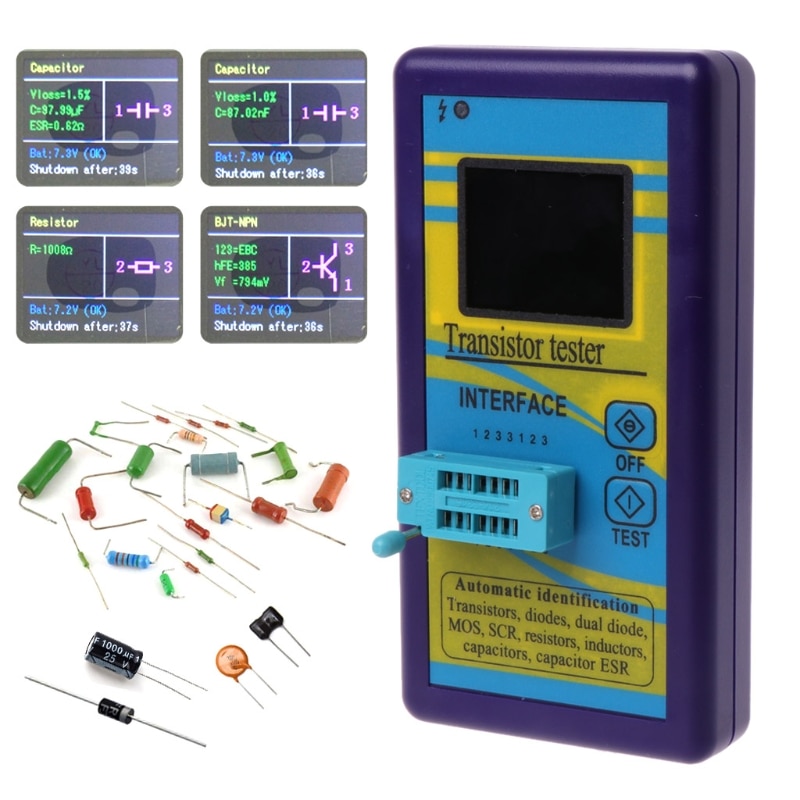
Using this device, the M328 component tester (Amazon link) will make your process easy. All you have to do is just put your diode in the socket of m328, press the test button, and it will tell you the exact terminals of that diode.
Steps for using the M328 tester
- Turn on the tester.
- Put on the provided socket
- Take the diode you want to test.
- Put that diode in the socket of the M328 tester
- Close the socket
- Press the test button.
- See the results on the display – it is that simple.
Now, I am sharing a method that can be used to work with SMDs as well, using this same device. This is totally optional if you don’t like it.
Take some long jumper wires and put them in the socket. Close the sockets properly. Now use the other open sides of these wires to test the SMDs diode.
This is not a professional method, but consider it a quick hack.
Method 2: By using a multimeter
This method, I am sure, you have used for testing a normal diode, i.e. with proper marking. This method requires a multimeter.
Now by using a multimeter you can achieve the same results using different strategies. Like, you can use the resistance option, the voltage option, and as well as the diode test option on the multimeter.

Follow the following steps to identify the terminals of unmarked diodes.
- Set the multimeter on voltage
- Connect the probes to the diode.
- If you see the results on the first try, good.
- But if you don’t see any results – change the polarity of probes.
- This time you should definitely see the results.
- Now note the reading, it should be around 0.7V for the Si diode and should be around 0.3V for the Ge diode.
- Note down the probes and the terminal of the diode.
- The red probe is the cathode, while black is the anode of your under-test diode.
It is that simple to tell the leg of an unmarked diode using a multimeter.
Conclusion
In this short article, we try to look at the two methods that we can use to identify the legs of an unmarked diode.
By unmarked diode, I mean the diode whose cathode sidebar is vanished due to time or any other reason.
Alright!
The two methods require you to have two devices:
- Component tester
- Digital multimeter
Both the devices are easy to use, and I can say you should definitely try them out for your learning.
I hope this article has helped you somehow.
The following are helpful resources to learn more about diodes.
- Easy diode reading for beginners (Pin, Bridge, Zenor)
- Diode Testing (Know if a diode is bad, open, or short)
- Diode Anode Cathode Identification (#2 Easy Methods)
- 13 Diode Functions in Circuit (Key Roles of Diode)
- Bad Diode Symptoms (How to know if a diode is bad)
- How To Test Diode Without Multimeter (Easy Solutions)
- Learn Diode Basics for complete beginners (Easy guide)
- Design of Half Wave Rectifier Circuit [Single Phase]
Thank you and have a grateful life.